So, as I've said I took the plunge last weekend and dyed yarn for the first time. It was really fun. I don't profess to know very much about all the difference techniques and processes but I will walk you through what I did and what I've learned through my research.
I used this tutorial, that I found on Pinterest, as my guide: Kathrynivy.com. There are several tutorials out there. There is a group on Ravelry called "A Kool Way to Dye", they have an extensive list of tutorials in the four basic food grade dying techniques. So I'll start here with my explanation.
There are four basic "dyes" that are food grade. Koolaid, Wilton's Cake Gels, Easter Egg dyeing tablets and food coloring. These dyes are non-toxic and because of this the tools and implements used in the dying process can still be used for food preparation afterwards. This of course is an asset when dying with children or experimenting just for fun like I did. These types of dyes only work on animal based fibers and nylon. So wool, llama, alpaca, mohair, angora and silk. Cotton takes a much more caustic process and acrylic is another technique entirely. So if this is something one wants to try just make sure your base yarn is animal derived or it wont work. Dyeing animal fibers requires an acid based technique. These four methods are all acid based. Acids commonly used are vinegar, lemon juice, or citric acid. The acid is either part of the dye or added to the dye bath at some point in the process. Since I used a PAAS Easter Kit I'll go through this particular process, which does differ from the other methods a bit. I would say find a tutorial for the individual process you plan to use.
The first step is to pick a yarn that will be suitable. It should be white or light colored and of an animal base or nylon. Superwash wools also work for this process, in fact they accept dye faster than non-superwash and there is no risk of felting during the process. (There is heat involved in all these processes.) For these two reasons I chose a DK weight Superwash wool. Trendsetter Yarns Merino Cable in white.
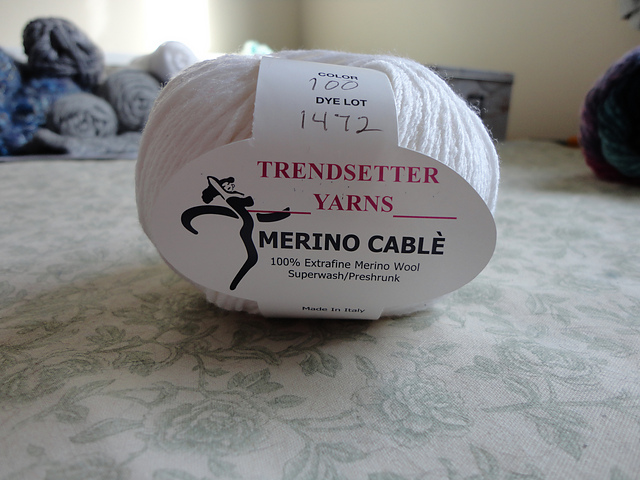
The next step is making a hank, if the yarn is not already in hank format. This as you can see was a wound skein so I needed to unwind it. I used my swift to do this but many tutorials said to wind it around the backs of two chairs. The circumference of this hank will factor into the way the final colors play out when knitted or crocheted. Since I'm not experienced in how all this works I cant speak to that specifically I just know it matters. I went with a small circumference in the hopes I would wind up with large chunks of color. The hank needs to be tied in a couple placed to prevent it from tangling up. I tied it in four places. I used the ends for two of the places and used two leftover pieces of cotton for the other two. Make sure to tie these loosely so the dye penetrates underneath.
Next the yarn must soak in water for at least a 1/2 hour. Dry yarn will not accept dye evenly. It is also recommended to add a small amount of vinegar to the soak. (Vinegar used throughout this process should be white vinegar, cheap low quality is fine.) The entire amount of yarn needs to be submerged so I covered it with a dinner plate to keep it under the water. While the yarn was soaking I mixed my dyes.
I used three color tablets and mixed them up according to the directions on the back of the box. One tablet dissolved in three table spoons of vinegar. I purchased condiment bottles from Walmart for the dye. I put the color tablet and the vinegar directly into each bottle. Once I no longer could hear fizzing and I couldn't find any remnants of the dye tablet left I added the 1/2 cup water with a funnel. The tutorial said to dilute the dyes to ones preference so I added a 1/4 cup more to each bottle. In hind sight I should have left the purple alone since after it dried it is on the light side for my preference. Originally I was only going to mix up two of the colors that came in my kit, the purple and the teal. I did the purple first then the teal. Once the teal reconstituted it looked very green to me, so I also reconstituted another tabled that I thought might be the teal. That one turned out to be a dark green. (I find this to be the downside of Easter Egg tablets, they are nearly impossible to decipher finished colors from.)

The work surface should be covered with newspaper or a garbage bag or both. We keep an old towel on our counter next to the sink, so I covered that with a garbage bag. I then put down a long strip of plastic wrap. The plastic wrap must be large enough to wrap the hank in for the steaming process later. Squeeze the water out from the soaked yarn. It doesn't have to be super dry but soaking wet yarn is not good either. Lay out the hank on the plastic wrap. I laid mine out in one long tube instead of in a circle. Then started squirting the dye where I wanted it. I started with purple. It is important to not squirt too much and wind up with a puddle underneath the yarn. The colors can mix this way and wind up muddy. The yarn will soak up the dye where you put it and wick it up as well. If you want even color make sure to get all parts of the yarn, inside, underneath, that sort of thing. I went with the very green looking teal next. I left a white space between the two colors so they could meet and blend through wicking action. This worked really well. Purple is made of two colors and the yarn will soak up the colors at different rates. Blue was taken up first so the blue seen on my finished yarn is the part that wicked the purple. Purple is one of my favorite colors so I put purple on the other end too. I did one squirt of the dark green and hated it so there is only a small blob of the dark green. (It did lighten up after drying so its not so obvious now.) One I was done squirting and manipulating the yarn I called it done. I think maybe I should have let it sit a little to soak up that purple a bit more, I'm not sure.
Heat is essential in the dying process, heat is what sets the color. The heat portion comes into play in different places in all these different processes. In the Easter Egg tablet method its here once the dye is placed. So I filled a pot with a few inches of water and put my burner on medium to get it to a boil. While it was heating I put a piece of tin foil over top and then cut some holes into it so the steam would come through. (I did this since I don't have a steamer.) I put some sag in the tinfoil so there would be room for the hank of yarn with the cover on the pot. I wrapped the hank of yarn in the plastic wrap and once the steam was flowing out of the holes consistently I placed the wrapped hank over the pot. (It was a smallish put so I coiled it around a bit so it would fit.)
Since I'm a genius sometimes this is when it occurred to me I should be taking pictures...


Next step is to let it dry. It should be out of direct sunlight and away from pesky animals... (I moved it out of the light once I took the picture.)

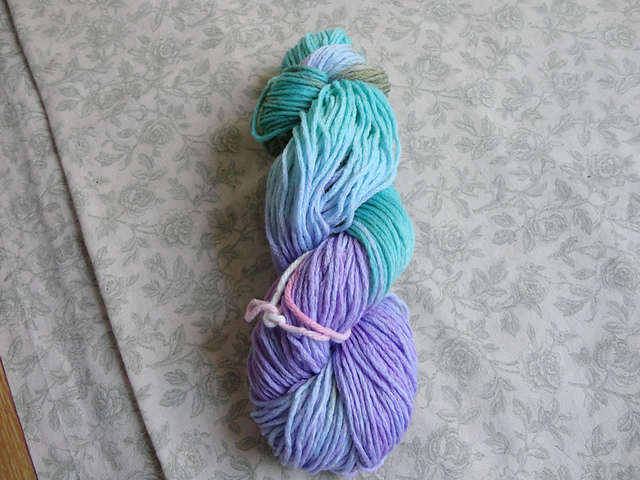 The colors lightened up a little and the dark green splotch is a little less obvious. The pink strand is from one of the cotton ties I used, see how it didn't take any of the color. Overall I call this a success. It was fun and I hope to do more at some point. I didn't use all the dye so right now they're in my fridge. I still have three more tablets that haven't been reconstituted. I just need to get some more base yarn. I hope you guys find this interesting and maybe even try it out yourself. Its great fun! Until later Happy Crafting!
-Q
I used this tutorial, that I found on Pinterest, as my guide: Kathrynivy.com. There are several tutorials out there. There is a group on Ravelry called "A Kool Way to Dye", they have an extensive list of tutorials in the four basic food grade dying techniques. So I'll start here with my explanation.
There are four basic "dyes" that are food grade. Koolaid, Wilton's Cake Gels, Easter Egg dyeing tablets and food coloring. These dyes are non-toxic and because of this the tools and implements used in the dying process can still be used for food preparation afterwards. This of course is an asset when dying with children or experimenting just for fun like I did. These types of dyes only work on animal based fibers and nylon. So wool, llama, alpaca, mohair, angora and silk. Cotton takes a much more caustic process and acrylic is another technique entirely. So if this is something one wants to try just make sure your base yarn is animal derived or it wont work. Dyeing animal fibers requires an acid based technique. These four methods are all acid based. Acids commonly used are vinegar, lemon juice, or citric acid. The acid is either part of the dye or added to the dye bath at some point in the process. Since I used a PAAS Easter Kit I'll go through this particular process, which does differ from the other methods a bit. I would say find a tutorial for the individual process you plan to use.
The first step is to pick a yarn that will be suitable. It should be white or light colored and of an animal base or nylon. Superwash wools also work for this process, in fact they accept dye faster than non-superwash and there is no risk of felting during the process. (There is heat involved in all these processes.) For these two reasons I chose a DK weight Superwash wool. Trendsetter Yarns Merino Cable in white.
The next step is making a hank, if the yarn is not already in hank format. This as you can see was a wound skein so I needed to unwind it. I used my swift to do this but many tutorials said to wind it around the backs of two chairs. The circumference of this hank will factor into the way the final colors play out when knitted or crocheted. Since I'm not experienced in how all this works I cant speak to that specifically I just know it matters. I went with a small circumference in the hopes I would wind up with large chunks of color. The hank needs to be tied in a couple placed to prevent it from tangling up. I tied it in four places. I used the ends for two of the places and used two leftover pieces of cotton for the other two. Make sure to tie these loosely so the dye penetrates underneath.
Next the yarn must soak in water for at least a 1/2 hour. Dry yarn will not accept dye evenly. It is also recommended to add a small amount of vinegar to the soak. (Vinegar used throughout this process should be white vinegar, cheap low quality is fine.) The entire amount of yarn needs to be submerged so I covered it with a dinner plate to keep it under the water. While the yarn was soaking I mixed my dyes.
I used three color tablets and mixed them up according to the directions on the back of the box. One tablet dissolved in three table spoons of vinegar. I purchased condiment bottles from Walmart for the dye. I put the color tablet and the vinegar directly into each bottle. Once I no longer could hear fizzing and I couldn't find any remnants of the dye tablet left I added the 1/2 cup water with a funnel. The tutorial said to dilute the dyes to ones preference so I added a 1/4 cup more to each bottle. In hind sight I should have left the purple alone since after it dried it is on the light side for my preference. Originally I was only going to mix up two of the colors that came in my kit, the purple and the teal. I did the purple first then the teal. Once the teal reconstituted it looked very green to me, so I also reconstituted another tabled that I thought might be the teal. That one turned out to be a dark green. (I find this to be the downside of Easter Egg tablets, they are nearly impossible to decipher finished colors from.)
The work surface should be covered with newspaper or a garbage bag or both. We keep an old towel on our counter next to the sink, so I covered that with a garbage bag. I then put down a long strip of plastic wrap. The plastic wrap must be large enough to wrap the hank in for the steaming process later. Squeeze the water out from the soaked yarn. It doesn't have to be super dry but soaking wet yarn is not good either. Lay out the hank on the plastic wrap. I laid mine out in one long tube instead of in a circle. Then started squirting the dye where I wanted it. I started with purple. It is important to not squirt too much and wind up with a puddle underneath the yarn. The colors can mix this way and wind up muddy. The yarn will soak up the dye where you put it and wick it up as well. If you want even color make sure to get all parts of the yarn, inside, underneath, that sort of thing. I went with the very green looking teal next. I left a white space between the two colors so they could meet and blend through wicking action. This worked really well. Purple is made of two colors and the yarn will soak up the colors at different rates. Blue was taken up first so the blue seen on my finished yarn is the part that wicked the purple. Purple is one of my favorite colors so I put purple on the other end too. I did one squirt of the dark green and hated it so there is only a small blob of the dark green. (It did lighten up after drying so its not so obvious now.) One I was done squirting and manipulating the yarn I called it done. I think maybe I should have let it sit a little to soak up that purple a bit more, I'm not sure.
Heat is essential in the dying process, heat is what sets the color. The heat portion comes into play in different places in all these different processes. In the Easter Egg tablet method its here once the dye is placed. So I filled a pot with a few inches of water and put my burner on medium to get it to a boil. While it was heating I put a piece of tin foil over top and then cut some holes into it so the steam would come through. (I did this since I don't have a steamer.) I put some sag in the tinfoil so there would be room for the hank of yarn with the cover on the pot. I wrapped the hank of yarn in the plastic wrap and once the steam was flowing out of the holes consistently I placed the wrapped hank over the pot. (It was a smallish put so I coiled it around a bit so it would fit.)
Since I'm a genius sometimes this is when it occurred to me I should be taking pictures...
My plastic wrap is red because I bought it right around Christmas, so you cant actually see that yarn like this.
The yarn must steam for at least 1/2 hour. The heat will make the yarn accept the rest of the dye and set the color. This method is colorfast so if its done properly these colors will be permanent and not fade or wash out. I set my timer to keep track of the time. I let it go just over 30 minutes. It did start to smell hot. Nothing was burning though, I made sure. Some of the dye dripped down into the boiling water so I think that's where the smell may have some from. Steam is very hot so at this stage tongs or oven mitts are required. Once the time is elapsed remove the yarn from the steamer, carefully. I placed mine in the empty sink. Now it must cool back down, leave it in the plastic wrap.
The next step, once the yarn is completely cooled, is to rinse it out. This is when you'll find out if you steamed it long enough. Unwrap it from the plastic wrap and place it in room temperature water. (The water should not be colder than the yarn and NEVER put in under running water.) If the dye starts to run wrap it back up and steam it longer. The dye didn't run on mine. I swished it around just a bit to remove any residue.
Next step is to let it dry. It should be out of direct sunlight and away from pesky animals... (I moved it out of the light once I took the picture.)
The final step it to make something out of it and see how the colors work out. This one I haven't completed yet. Right now its sitting around taunting me since I haven't found the perfect pattern yet. Here it is all dry and twisted back up.
-Q
Comments
Post a Comment